Wednesday, December 16, 2009

This Year's Teacher Gifts

I will be honest. I completely forgot about teacher gifts until yesterday when I was dropping one of my daughter's off at school and saw a little boy with a gift for his teacher. Um, oops? I am new at this. So I did what any respectable mom would do...ran to the nearest store and brainstormed, remembering all that I have ever read about what teachers REALLY want for Christmas in Parents Magazine. Here's what I came up with:
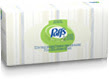
Tissues


Hand Sanitizer

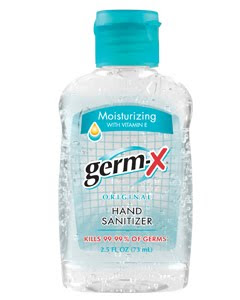
A candy cane full of Hershey Kisses.

Then I put all of them in a cute bag with a little poem:

We really love our teachers,
We miss them when they’re sick,
So we thought you could use some things
To make the germs not stick!

First some sanitizer,
To make your hands all clean,
Because we know that sometimes kids
Leak stuff that is green.

Next up are some tissues,
Just in case you catch a cold,
They even have lotion on them!
They’re soft when out they’re pulled.

Finally, to show our love
We’re giving you some kisses,
But this kind won’t make you sick
The chocolate kind, this is!

Thank you for your work,
You make our school so fun!
We wish you Happy Holidays
And now our poem is done!


Feel free to use this idea and poem for your favorite teachers!

Tuesday, August 4, 2009

Quote project

I am taking yet another class on Photoshop...this one is all about brushes and I have already learned some new things (it's only day 2)! I used a quote by Marianne Williamson to make a cute wall hanging. The journaling frame thing is a brush by Nancie Rowe Janitz, as is the chalking. Very cool!

Monday, June 29, 2009

Two in one week...

I love scrapbook challenges, especially when I am able to think of an idea right away to fit the challenge. This challenge was to use a screen shot from a website on a page. I had just taken some fun pictures of my kids and nieces and nephews holding a toad, so I did a quick search on Wikipedia for toad info. I found a page I liked and did a screen shot, then cropped out the pictures I didn't want on my page. I found papers and elements to fit the feel of the page, then put it all together. Here's how it looks:


Supplies:
Background paper: Harvest Sky by Gina Cabrera, Digital Design Essentials (I changed the color of it, though)
Stamped letters: Little Dreamer Designs (color change by me)
June Tag: LivE Designs (JessicaSprague.com)
Stapled Tags: Thank Ya Kindly kit by Jessica Sprague
Dotted paper: Creativity by Crystal for JessicaSprague.com
And the font for journaling is Cochin (I think I forgot to list that when I posted it to the Spraground gallery. Whoops.)

Wednesday, June 24, 2009

And finally, another scrapbook page!

Between photography classes, photoshoots, and now editing classes, I haven't had much creative computer time for scrapbooking. This is interesting, considering that the reason for the photography and editing classes is to take better pictures for scrapbooking. However, this week is the 2nd birthday bash for my favorite digi-scrapping website, Jessica Sprague, and to celebrate they are having some fun challenges and freebies. Yesterday's freebie was just what I needed to make a page out of this:


This is easily one of my favorite photos right now. I took it for my Portrait class last month, but have had it planned ever since my daughter started holding worms. When I saw the challenge and freebie yesterday over at Jessica Sprague, I knew the page and photo were perfect for each other. Here's the finished product:


The papers and embellishments are all from the freebie kit by LivE Designs, which is now available in the Jessica Sprague shop. Fonts are Savoye LET (titles) and Bodoni SvtyTwo OS ITC TT.

Sunday, May 31, 2009

D & D and their little dog, too!


My brother-in-law and his lovely wife were so kind as to pose for one of my portrait class assignments this week. I took a bunch of photos and haven't been able to edit very many, but I wanted to share a few:

Thanks you guys! You are awesome...this was a lot of fun! I can't wait to show you the rest...

Monday, May 18, 2009

Friday, May 8, 2009

Portrait Class

Here are some pictures of R that I took for my portrait class. I used the "Fresh and Colorful" action to bump up the color a little bit.

Friday, May 1, 2009

Ice Cream Social Centerpieces

For our recent ward Ice Cream Social, I made simple and fun centerpieces using canning jars, Styrofoam balls, wooden skewers, and plastic spoons. I got the idea from a cute centerpiece I found in a "Parents" magazine a few years ago, but adapted it to fit the theme of the party and what I had on hand. Please ignore my mess in the background...these aren't the most tidy project, but they were worth it!

First I grabbed some small canning jars...the pint size, not the jelly size...and stuck a 3 inch Stryofoam ball in each one. It took a little pressure to get them in there, but not much.


Then I took some shredded paper (I bought mine pre-shredded at the craft store, but you could grab your handy paper shredder and make your own just as easily) and stuffed it down around the ball. I tried to keep the ball towards the center of the bottom of the jar. Using the flat end of one of my wooden skewers to tuck the paper around the ball worked really well. I wanted to hide the styrofoam the best I could, so I used white paper.


Once the ball was hidden I took some more paper and tucked it on top, filling the jar most of the way.


To make the jar a little more decorative, I tied a piece of ribbon around the rim. I cut a piece of ribbon long enough to go around the rim and tie a bow. I think they ended up being around 10-12 inches long. Then I placed a glue dot on the back of the rim of the jar and attached the center of the ribbon to the glue dot. I wrapped the ribbon around and made a little bow in the front. I used two different types of ribbon. Both were from American Crafts.

One was white multi dot:


And the other was yellow:


After I tied a bow around each jar, I got busy painting my wooden skewers. You could use dowels or heavy wire or something like that. I just used bamboo cooking skewers that I found at the grocery store. They were about 12 inches long and a little thicker than the shorter lengthed skewers. I painted the skewers yellow, pink or green with regular craft paint and trimmed about an inch off the sticks I was planning use in the smaller jars. After they dried I used hot glue to attach white plastic spoons to each skewer. I glued some spoons pointing up and a few pointing down (that took a little more patience). I apologize for the lack of pictures of this process...if you have questions, please let me know, but it is pretty basic. One thing I would have done differently is use a foam brush instead of a regular paint brush. That would have made the process go a little more smoothly.

Once my spoons and skewers were prepared, I stuck 3 in each of my small jars, using the sharp end of the skewer to anchor the spoon and stick into the ball. I did make 2 larger jars and used 5 spoons in each of those...I think I liked the look of the 3 spoons in the smaller jars a little better, though. Then I fluffed up the paper a little and added a little more paper just to fill in any empty head room in the jar. Here is what they looked like when finished:

Sunday, April 26, 2009

A Day at the Zoo

The patterned papers are all from the "Energy" kit by Summertime Designs. The cursive font is Schoolhouse Cursive. I can't remember what the other two are, but I will post them as soon as I get a chance to look them up.

Tuesday, April 14, 2009

Trying to practice and keep up momentum


I am trying to keep up my momentum of photography since my class is now over (sad!) Yesterday I found myself at the local zoo with my girls. They love the animals and seeing them, but the real highlights of yesterday's visit were ice cream cones and carousel rides. I got some cute pictures of them in both situations. I just want to share 2 here.

This is R on the carousel.
1/60
f/4
ISO-100
30 mm

I did run the "Fresh and Colorful" action from the Pioneer Woman's Action Set #1. I believe I decreased the opacity of the light layer just a tad so it wouldn't look too overexposed.

This is A during ice cream time.
1/30
f/4.5
ISO-200
35 mm

I tried running the same action on this photo, but the general consensus was that it made it a little too something. Maybe the yellow shirt and pink jacket were just too much. I was trying to use the leading lines of the bricks to draw the focus of the picture to the subject. And I decided getting a little kid to pose is kind of hard when she is being silly and eating ice cream.

Sunday, April 12, 2009

Week 6--composition

Here are my 2 assignments this week:A
Canon EOS Digital Rebel XTi
1/60
f/5.6
ISO-400
49 mm

My Life
Canon EOS Digital Rebel XTi with 50 mm 1.4 is lens
1/2000
f/1.6
ISO-100
50 mm


I have loved this class! I am sorry it has come to an end!

Friday, April 10, 2009

Week 5-Lighting

I know, I am behind! Here is my technical assignment for week 5. The lesson was on lighting. Usually I post my technical and creative, but I wasn't thrilled with my creative assignment. Lack of planning made it more snapshotty than creative.

But here is my bowl of fruit:

Canon EOS Digital Rebel XTi
f/4
1/8
ISO-200
27 mm

I will have one more assignment to post...I have so enjoyed this class and learning about photography! I am excited to learn more...I haven't felt this energized about learning since college!

Sunday, March 29, 2009

Week 4- Focal Points


Really quick, here are my assignments for this week:

f/4.9
1/80
ISO-200
40 mm


f/1.4
1/250
ISO-400
50 mm
(I took this with my NEW lens! Yippee! 50 mm 1.4--check out that awesome background blur!)

Saturday, March 21, 2009

Week 3- Manual Mode

I have to say I was completely overwhelmed this week...I had to read the lesson on Manual Mode about 3 times before I got brave enough to even switch the dial on my camera to M. But I finally did. And I started taking pictures. And now I think I am in love with Manual mode.

Here is my assignment picture....


1/80
f/4.5
ISO-400
34 mm

For our creative assignment we were supposed to try to illustrate an emotion or feeling. I love having peace in my home and life, so I cleared off my kitchen table, grabbed a little jelly jar with some lavender hyacinths in it and started snapping away (in manual mode). This was my favorite of the bunch:


1/50
f/4.5
ISO-800
28 mm

And this is what my teacher thought...

My teacher, Candice, left me the nicest comment about my open aperture pencil picture (see below)! Here is what she said:

candice*stringham
[Mar 20, 2009 at 11:37 PM]
I think this image is lovely! All the tones work so well together and there is just something about new pencils that is almost romantic isn't there? Anyway, you did a good job picking out the apertures. I think the reason on the closed aperture you were having a hard time is because when the aperture is so closed you have to let in light other ways and that means a really slow shutter speed. And as you know from lesson one a slow shutter speed equals camera shake. I think that was probably what was happening. If you turn up you iso it will help or if you open your aperture a little or if you moved to brighter light or use a tripod. Any of those things will help. But I must say I think you have an eye for this!

I am very proud! I feel like I just got a gold star on my forehead!

Saturday, March 14, 2009

Assignment #2

This week's lesson was on aperture...a good thing, since this is something that has always confused me. An open (large) aperture lets in more light, and usually uses a faster shutter speed, resulting in a blurred background...
1/50
f/3.5
ISO-400
22 mm

A closed (small) aperture is a smaller opening, meaning less light and longer shutter speed, things are more in focus, even in the background...1/6
f/10
ISO-400
24 mm

This is not the best example...see how the background is still a little blurred? But there is a difference between the two.

The confusing this is that a large aperture is a smaller number and a small aperture is a big number. Less is more.

Right now I only have the kit lens for my camera (I just ordered a new lens...I am excited!). It doesn't allow for a very large aperture, so in low light it doesn't do very well. Which is too bad, because I take a lot of pictures inside. I took this picture outside in the middle of the day and I love how it turned out...my baby didn't really want me taking her picture. She wanted me to push her on the swing.

1/1600
f/5.6
ISO-400
50 mm

Wednesday, March 4, 2009

Photography class assignment #1


I started taking an online photography class this week and am already learning so much! Here are the pictures I posted for assignment 1. This week's lesson is on shutter speed. The first picture is a slow shutter speed:

f/36
1/50
ISO-400
46mm

The second is with a high shutter speed:


f/10
1/500
ISO-400
52mm

Both were taken in natural light with a Canon Digital Rebel Xti. See the difference? A few days ago I could not have told you how to do this. Hee hee. Learning is sooo fun!

Monday, February 16, 2009

Using the Seventies Action

Today I took this picture of my daughter:


It looks fine, though I did let her pick out her own clothes. We are potty training, so I figure the pants won't last for very long. As a result, I wasn't too picky. But the bright pink and yellow contrast a little too much. So I decided to try out a Pioneer Woman action that I have been eager to use. I pulled the picture up in Photoshop and used the "Seventies" action to try a different look. It really washed my baby out, which isn't THAT hard to do...we are both pale faced girls. So I played with opacity. I think I reduced it clear down to 25-30%...just enough to avoid looking completely washed out but enough that you can tell a difference between it and the original. Barely. Here is the result:


One of the awesome things about the Pioneer Woman's Action Sets is that they are free! I am still somewhat of a novice in using photoshop, so I haven't felt brave enough to buy any actions elsewhere. They can be a little pricey. So if you are like me and are just starting to play, I highly recommend them. You can find them here.

Friday, February 13, 2009

A Valentine for Your Sweetheart

Here it is...Valentine's Eve. If you are like me, you are still putting the finishing (or beginning) touches on that special someone's Valentine. What says "Love" better than a handmade card? Especially one that looks like this:

I am keeping things simple with this card...here's what you need:


Brown, red and cream colored paper or cardstock
Heart stamps or images...I used the Happy Hearts set from Stampin' Up!
Letter stamps or images...I used the Big Deal Alphabet from Stampin' Up!
If you are using stamps you will need a red inkpad, preferably one that matches your red paper.
A paper cutter and or scissors
2 paper punches...one that is a 1/8" circle and the other is a square...you don't necessarily need to have a square one, but it helps.
Adhesive of some sort

To get started, cut a piece of brown paper to be 4 1/4" tall by 5 1/2" wide.


Using your 1/8" circle punch, make a row of holes along the bottom of your card, about 1/4" up from the bottom. You can use a ruler to space them out exactly or estimate for a less perfect look. I wound up with 24 holes.


If you have a little 1/4" square punch, use it to punch out some red and cream colored squares. Then cut each one in half.


Make sure you have the same amount as you have little round holes, because you're going to glue a little piece of red or cream paper on the back side of your card so the colors will show through the holes.


Then stamp your letters and a small heart on cream cardstock using your red ink pad. If you're using a pigment ink pad (like I was) give yourself some time for the stamped images to dry before you cute them out. That way you will avoid smudging.


Then follow the instructions below...click on the image to enlarge it:


Arrange your squares in the center of your card to look like this (think the "Love" postage stamp that was around a few years back) and then place the small heart in the center of your letter "O". I used a dimensional to puff the heart out a little from the rest of the card. These are little sticky spongy doo-dads. You can get them in the scrapbook/card making section of your craft store. I got mine from Stampin' Up.

Cut an 8 1/2" x 11" sheet of cream cardstock in half and then fold one of the halves in half to create the base of the card. Glue your card front on and....ta da! A Valentine for your sweetie!


Happy Valentine's Day, everyone! I hope it's a good one!